SwiftUI previews are a great way to check your design looks as expected while you’re writing code, without having to wait for a full project to build. But did you know you can also use them to check that your accessibility experience looks as it should? While assistive technologies like VoiceOver or Voice Control require require interaction on a real device, previews can still help verify anything that has a visible impact on our UI. There isn’t yet a single way to set up all of these, the various options are spread across Xcode’s Canvas settings, preview traits, modifiers, environment properties, and even some private APIs. However, adding preview variants is often a quicker choice than building to a device and navigating through settings to enable accessibility features.
Canvas settings#
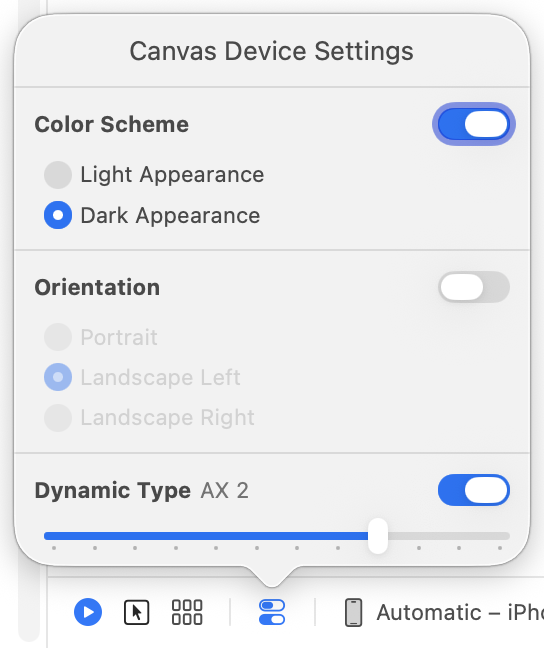
The Xcode canvas provides some built-in variations for any SwiftUI preview, meaning you can enable these at any time without modifying your preview code. At the bottom left of the canvas pane in Xcode you’ll find Variants and Device Settings buttons.
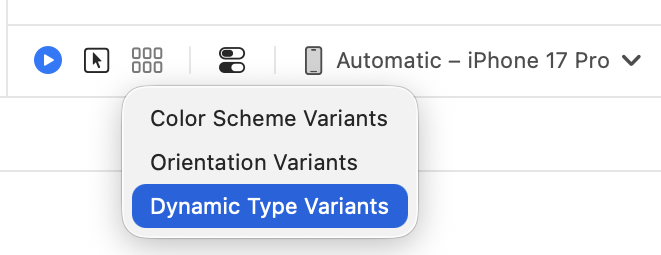
Variants will show you a multi-up view of your view in either dark and light modes, orientations, or the full range of dynamic type sizes.
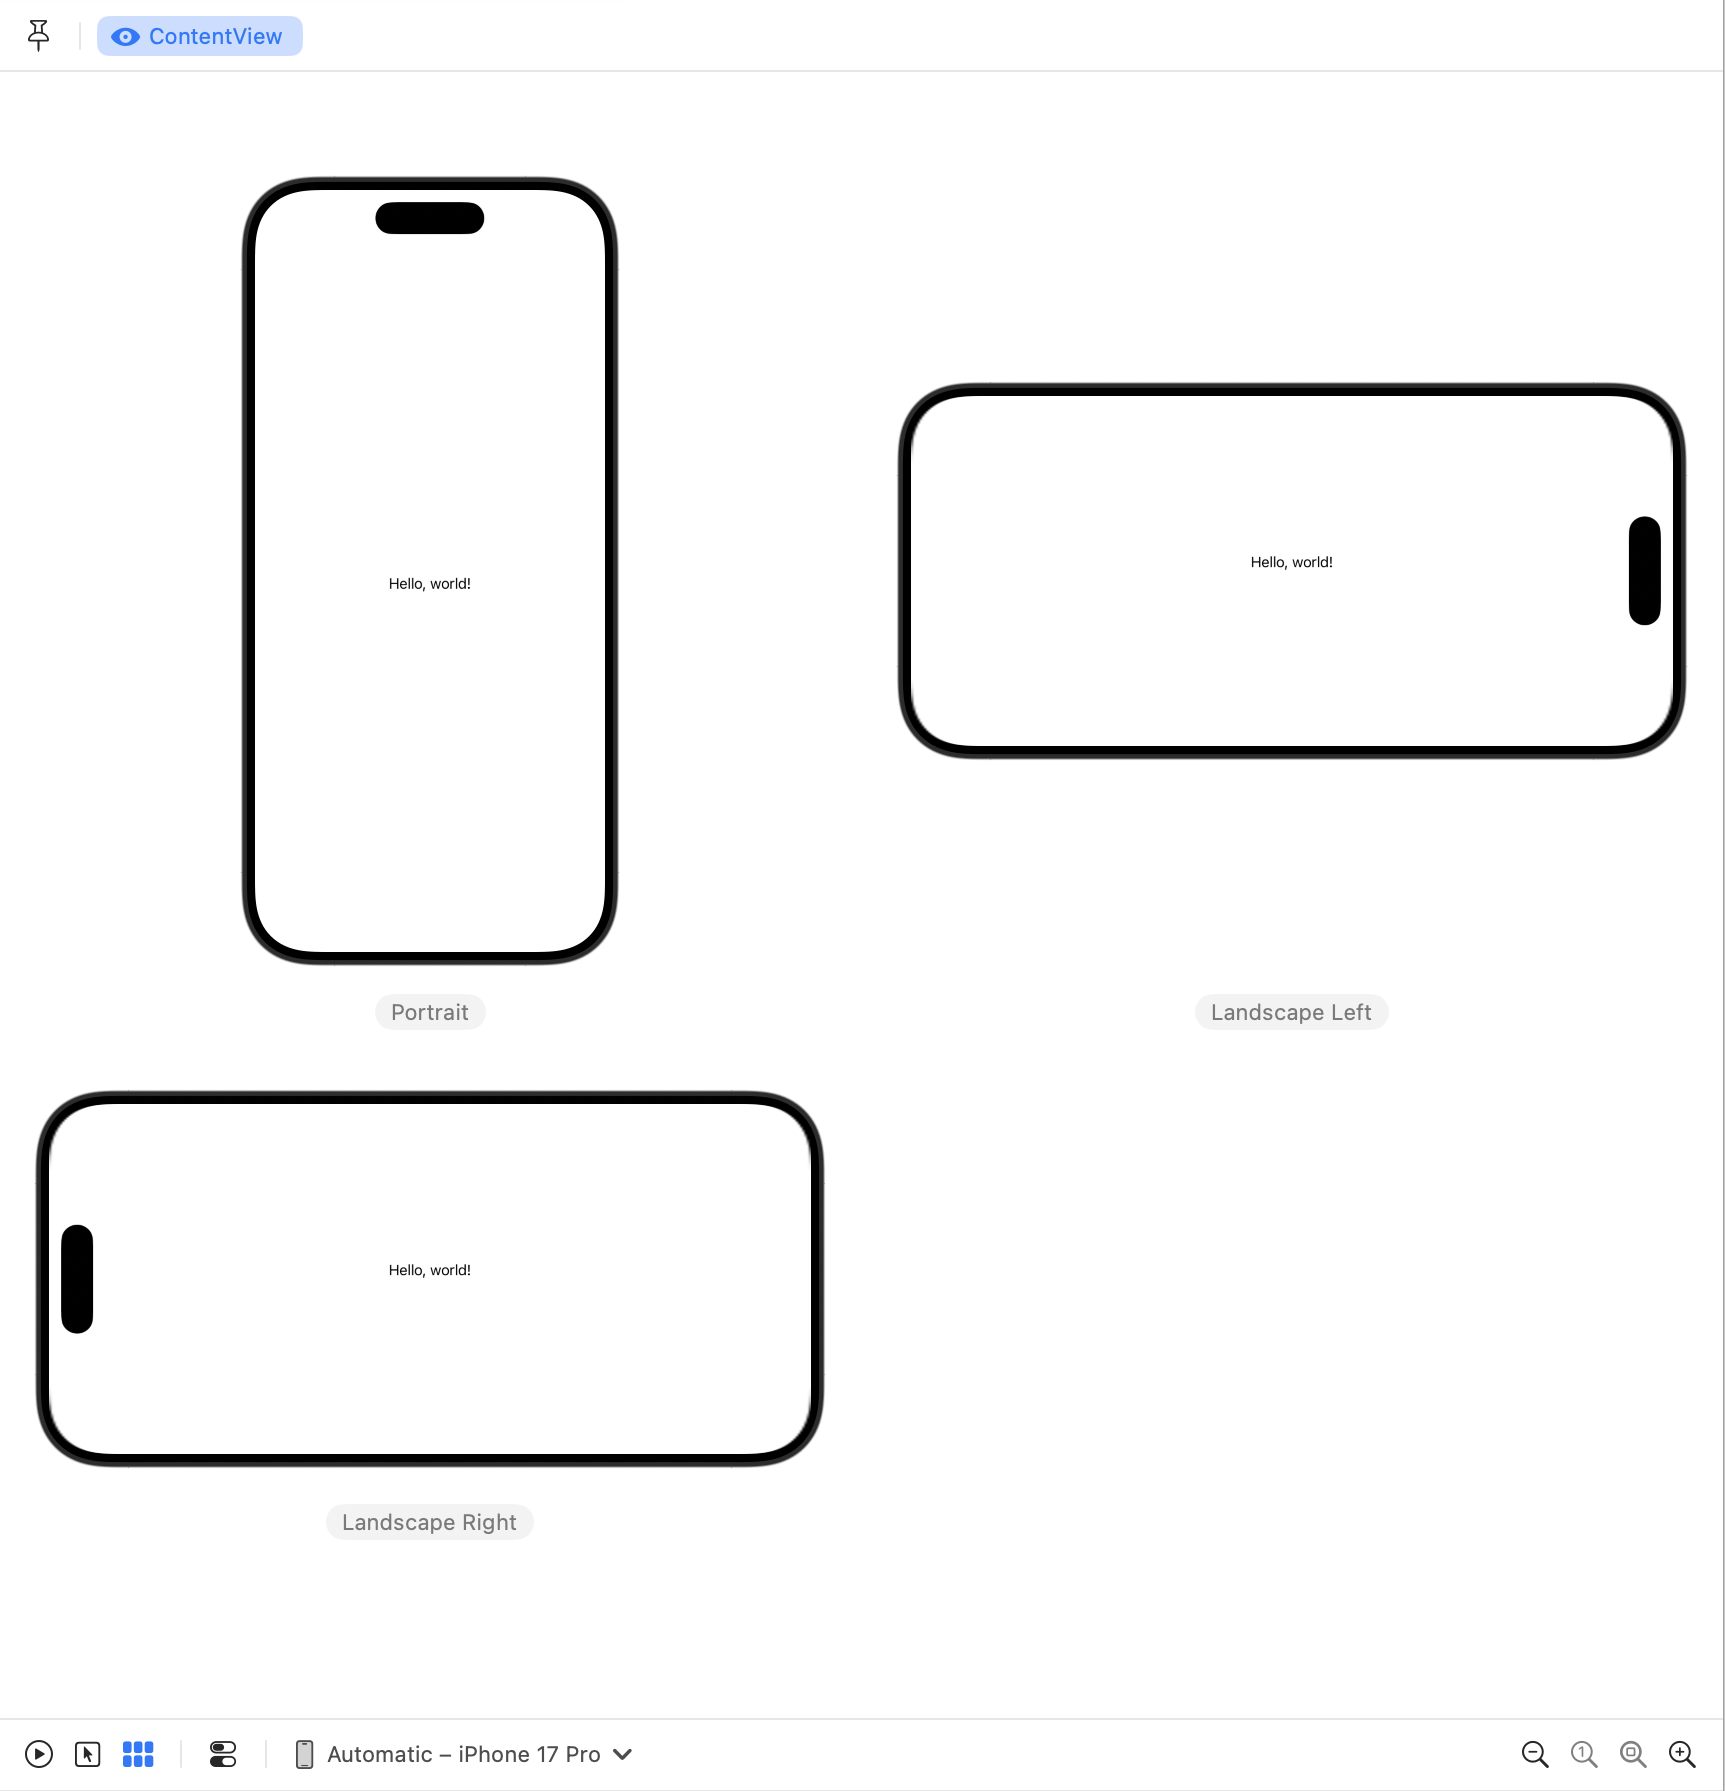
The Canvas Device Settings button lets you to switch between the above options for any of your previews.
The canvas settings are great for quick checks while you build, but what if you want something more persistent? For that we can define configurations in our preview code.
Preview Traits#
The #Preview macro allows us to specify a subset of traits for our previews, although as of Xcode 26 these options are limited, but still useful.
For example, using the following we can create a preview with a landscape right orientation.
#Preview("Landscape Right", traits: .landscapeRight) {
    ContentView()
}
Other orientations: portrait, landscape left, and upside down; are also available.
The only other trait of use at present is .assistiveAccess. While this will not be relevant for most apps, if you support assistive access this is a great way to ensure you’re keeping that experience clean.
Modifiers#
Using a handful of SwiftUI modifiers and the environment system we can specify some accessibility related attributes for our previews.
The .dynamicTypeSize() modifier allows us to specify a dynamic type size for our view. The example below uses the largest available size. I would also suggest creating a preview with .xSmall to check the smallest possible size.
#Preview("Largest text") {
    ContentView()
        .dynamicTypeSize(.accessibility5)
}
To create a view permanently in dark appearance, to avoid using the canvas toggle, add the .preferredColorScheme(.dark) modifier.
#Preview("Dark") {
    ContentView()
        .preferredColorScheme(.dark)
}
The SwiftUI environment system allows views to read properties to determine how they should display, in some instances we can also set these properties.
A useful option for us here is to set the .legibilityWeight environment property. This allows us to check that all of our fonts support bold text when the user has this enabled, and that our layouts are flexible enough to allow that. I’d recommend using this in association with the .dynamicTypeSize(.accessibility5) modifier to ensure your view works with the largest text setting possible for the user.
#Preview("Bold text") {
    ContentView()
        .environment(\.legibilityWeight, .bold)
}
For localised apps you can force a preview to follow a given locale causing the view to load the strings from your catalog for the given locale. A couple of tips I use when checking localisation - German is good for checking you have enough flexibility for text to grow as the words are often longer than English. French is a great language to detect if all your strings are localised: While many languages will commonly borrow words from English, French tends to stay away from borrowing English terms.
#Preview("German locale") {
    ContentView()
        .environment(\.locale, .init(identifier: "de"))
}
A further localisation consideration we can verify with SwiftUI previews is right to left layout. In Arabic and Hebrew the leading and trailing edges are swapped. If you’ve set your content appropriately things should be aligned to the opposite sides. If a left or right alignment has snuck in somewhere, this will quickly reveal it.
#Preview("Right to Left") {
    ContentView()
        .environment(\.layoutDirection, .rightToLeft)
}
Private APIs#
While it’s generally good practice to wrap your previews in an #if DEBUG compiler macro, if you choose to use one of these private apis that conditional compilation is essential. Failing to do so could lead to a private symbol showing up in your binary which may cause Apple to reject your app at app review. Clearly, you should use these with care, and at your own risk. That said, I would imagine these are on the safer and more stable end of the private API spectrum.
There are a selection of accessibility setting related environment properties that are read only. Mostly this is because we really shouldn’t be forcing accessibility settings on a user in production code, but in previews the ability to force those settings is valuable. I won’t cover what each setting does here, that’s a different post, but the view-based accessibility settings below can be set by adding a cheeky underscore to the environment property name to access the private keypath.
#Preview("Increased contrast") {
    ContentView()
        .environment(\._colorSchemeContrast, .increased)
}

#Preview("Reduce motion") {
    ContentView()
        .environment(\._accessibilityReduceMotion, true)
}

#Preview("Reduce transparency") {
    ContentView()
        .environment(\._accessibilityReduceTransparency, true)
}

#Preview("Differentiate without colour") {
    ContentView()
        .environment(\._accessibilityDifferentiateWithoutColor, true)
}

#Preview("Invert colours") {
    ContentView()
        .environment(\._accessibilityInvertColors, true)
}

#Preview("Button shapes") {
    ContentView()
        .environment(\._accessibilityShowButtonShapes, true)
}
Making iOS do things it’s not strictly supposed to do is always fun, so if you stumble across any other hidden environment properties that could be valuable in previews, please let me know!
As with any SwiftUI modifiers, you can chain these together to make previews with multiple properties set. Share your most powerful preview combinations with us!